Review: Epson EB-1430Wi Meeting Mate Interactive Projector
An ultra-short throw projector with some really useful bells and whistles.
Review:/ Stephen Dawson
The other day I received a press release from a major manufacturer of projectors boasting that it proudly held second place for global sales share. Guess which brand holds first place? Yes, Epson of course, and for good reason, given the enormous variety of its products.
DESCRIPTION
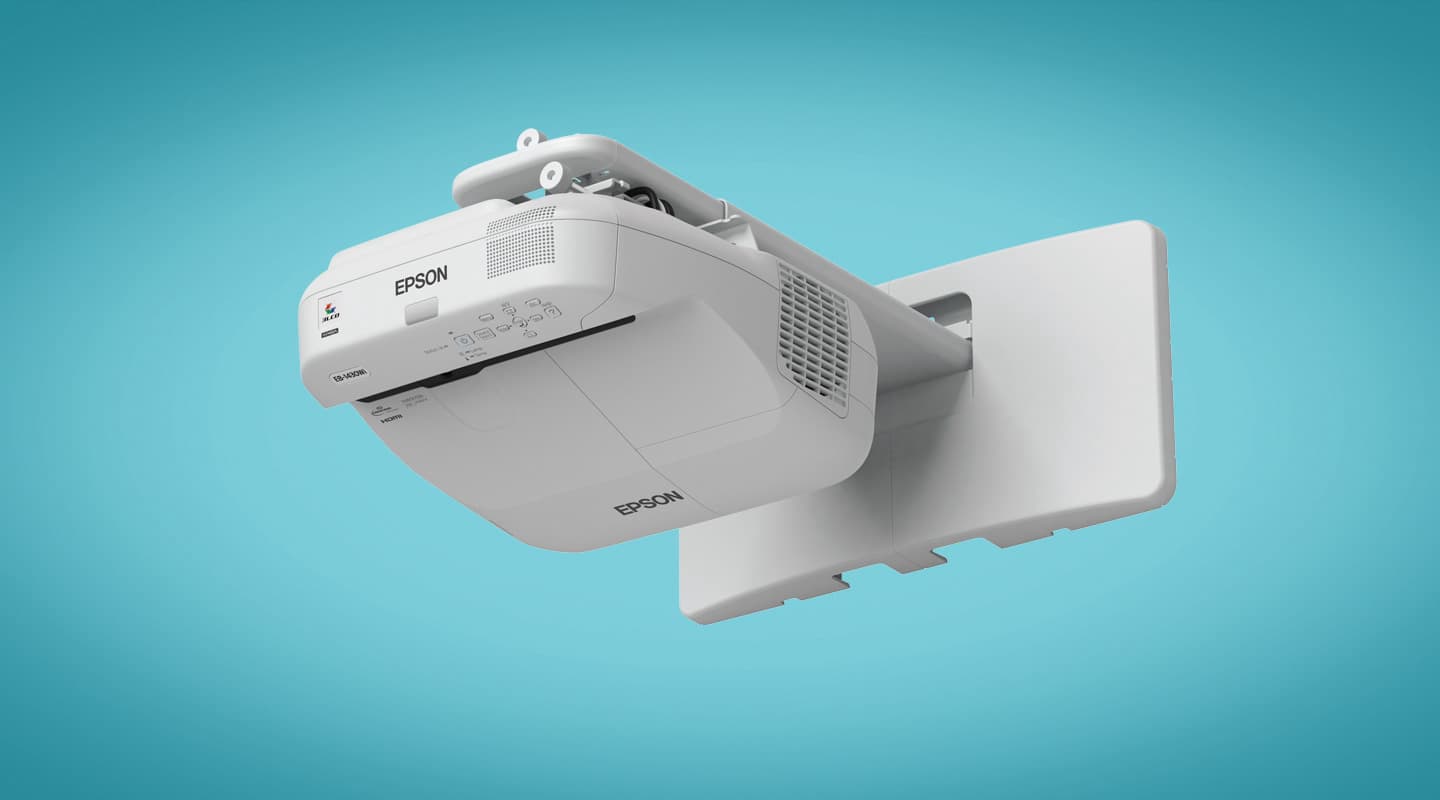
The Epson EB-1430Wi Meeting Mate is an ultra-short throw interactive projector. Typically it will be attached to a wall, poking out into the room above the screen. It will project the image down onto the wall (or screen). At the smallest screen size it protrudes into the room only by about 440mm, but it can slide out for a larger projected image.
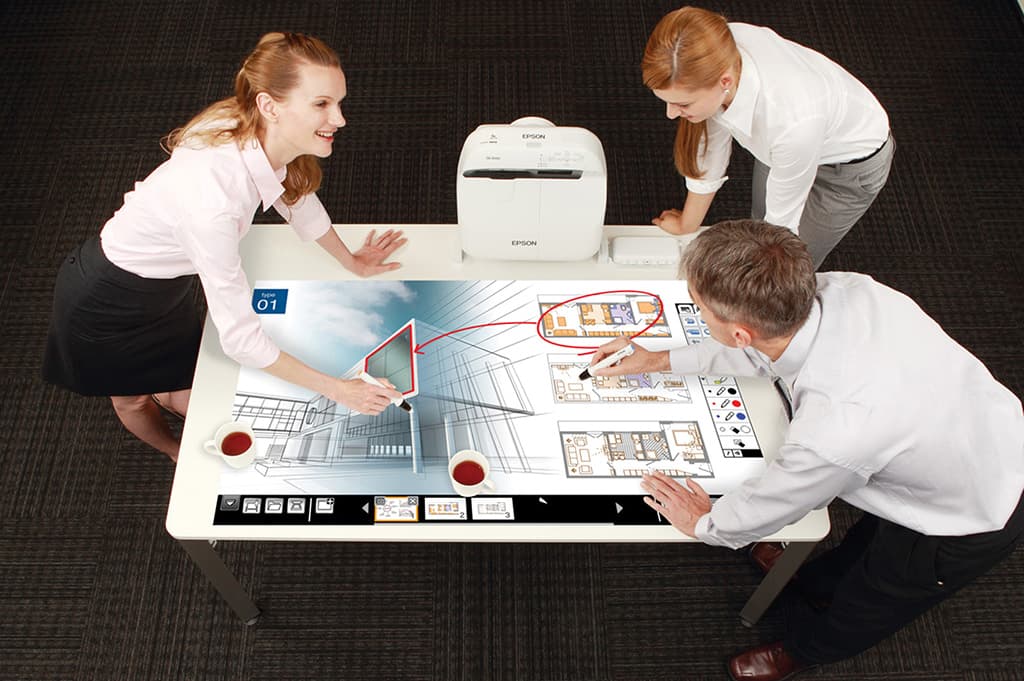
All that’s nice, but where it gets tricky is that the projector is interactive. That is, you can ‘draw’ on the screen with the two included styluses and, even more clever, with your finger or any other object.
This is virtual drawing of course. You leave no mark on the screen, other than those from a grubby finger. The projector detects the position of the stylus or your finger, and then inserts a line onto the projected image to match.
The projector offers up 3300 ANSI Lumens, both in colour and white according to Epson. The screen resolution is a relatively modest 1,280 x 800 WXGA. Normally I’d whinge about anything less than full HD, but this is not really intended to be a general purpose projector that might find itself pushed into movie night duties. The resolution provided is plenty for its intended purpose.
That said, the unit does have HDMI inputs and D-sub15 and even composite video, and it does support full HD signal standards (and MHL signals from certain Android devices). Plus just about all computer signals up to full HD. You can easily use the unit with your computer for the display of a PowerPoint. I will be mostly talking about the interactive features.
The projector comes with all the extras it needs to provide full functionality. That includes the wall mounting bracket with a sliding arm, an infrared remote control, a wi-fi attachment, a wall control plate which doubles as a convenient USB connector, two styluses and a touch connector attachment.
INSTALLATION
Installing the projector is not for the faint of heart. Quite a careful calibration process is required, particularly for the finger interactivity. The styluses [hmm… styli – Ed] are battery-powered and have active heads transmitting a signal (infrared, I believe) that is tracked directly by a camera located next to the projection lens.
The finger detection system, though, requires the ‘Touch Unit’ which projects an invisible grid pattern just above the projection surface. It must be aligned so that the grid runs just above the entire surface. This can be a bit fiddly. Multiple projectors located in different rooms can be linked together for collaborative or for master/slave operation.
The installation of multiple projectors can be facilitated by the ‘batch’ installation mode (where certain settings are stored to USB from the first-installed projector and then loaded into other ones).
The sliding arm on the mounting bracket has a range to allow the projector to display images between 60 and 74 inches (1520mm to 1880mm) on their diagonal in a 16:10 aspect ratio.
MORE INFO
Epson EB-1430Wi
Meeting Mate Interactive Projector
Price
AU$3,699
Warranty
Three years
(first of 12 months or 750 hours on lamp)
Contact
Epson Australia Pty Ltd: +61 (0)2 8899 3666 or www.epson.com.au
IN USE
Installation might be a little fiddly, but once done it’s hard to see how using the projector could be easier.
Aside from the super short throw nature of the unit, in operation when used with an external source it is pretty much like any other Epson projector. Except that you can annotate the projected image. And then save it to the ‘whiteboard’ mode, or indeed save it to storage.
If you want improved personal interaction with your audience, you can set the projector to computer interactive mode. That way you plug the computer into the projector via USB rather than HDMI or D-sub15 and install the appropriate driver. You can then use on-screen interaction to control the computer itself.
Storage for saving material can be USB plugged directly into the projector, or more conveniently, USB plugged into the wall plate. You can also plug your computer into this for USB image connection, but have to plug directly into the projector for HDMI or D-sub15. Alternately, your storage can be a shared folder on the LAN. The projector supports both wired and wireless connectivity.
Most interesting, though, is the ‘whiteboard’ mode. For this you need no source. Your projection screen becomes a virtual whiteboard.
Actually, that’s underplaying it. It becomes a virtual flipboard because you can have multiple pages of whiteboard content and switch between them with the touch of an icon.
WHITEBOARD MODE
You can draw on the whiteboard in several colours, with different colours assigned to finger and the two styluses. Two different line thicknesses are available. There is an eraser plus a highlighter which applies translucent colour over existing material.
Applying all these was smooth and reliable. I was able to scribble fairly quickly without dropping segments of drawing. Up to six fingers can be used in addition to the styluses.
You can bring up images previously saved to your storage (USB or shared folder), annotate them and save them. This includes captures of from external sources previously made, or indeed selected sections of such images. You can print material to an Epson or other printer supporting PCL (the de facto standard derived from HP’s Printer Command Language for its ThinkJet printers).
You can also email the pages, or sections of them, directly from the projector. There’s an address book for holding contacts to make this reasonably convenient.
It is clear that the drawing software is object-oriented in design, somewhat like a vector drawing program, though without its flexibility. If you draw an X on the screen as two single strokes, then the strokes are two separate objects. A freeform selection tool (there’s also a rectangle one) allows you to select just one of the strokes and you can move it, copy and paste it, delete it, rotate it or resize it. If you resize then the line scales up smoothly, preserving clean edges to the maximum resolution available with the projector, rather than becoming jagged.
Of course, if you have opened up a graphic from USB and select and scale up a portion of it, that does become jagged because it is merely a bitmapped graphic rather than an object.
When you save you have a choice of PDF, PNG, EWF. This last appears to be a proprietary format for Epson, so you can’t really use it anywhere else. But for the projector it is extremely useful because it preserves the object oriented nature of the graphics. You can reload it in another session and be back precisely where you were, able to manipulate individual objects again.
The PNG format is the standard computer one. The pages are saved with a resolution of 1,280 by 800 pixels, matching the projector’s display resolution. The PDF format doesn’t maintain the objects as objects, except to the extent that they are vector defined within the PDF file, so they scale up smoothly. This would be the best format if you want to keep the slides you’ve created for future printing.
PICTURE QUALITY
The projector did a competent job of downscaling higher resolution images, and it was certainly very bright, with strong colours, even under significant ambient light. The brightness of the image appeared uniform to the eye across the screen and the picture geometry was undistorted. Of course, it’s generally best to set a PC’s output to match the physical resolution of the projector to achieve the best presentation of its contents. That way all material – particularly text – is generated optimally for the resolution, rather than having to be scaled.
PRACTICALITIES
The projector took just three seconds to switch off its cooling fan after being shut down, even in normal mode. Startup was relatively slow, taking 70 seconds to get going in whiteboard mode, and then another 30 seconds or so to reach full brightness.
The unit is rated to consume 365W during operation. Standby power consumption is 2.5W with the network functions idling but available, or 420mW with them off. A replacement lamp is priced at just AU$79. The rated lamp life is 4000 hours in normal mode, 6000 hours in low-output mode. Assuming electricity costs 20c/kWh, this projector would cost just 9.3c per hour running in normal mode, of which less than two cents is lamp cost.
CONCLUSION
What a wonderfully useful device the Epson EB-1430Wi projector is. All a presenter needs to do is punch the ‘whiteboard’ button on the wall plate, grab a stylus (or not, because of the finger functionality), and after a couple of minutes start writing away. No need for photos to preserve annotations, and the contents can be emailed easily to meeting participants.
It looks like it might be offering an actual new way of doing business.
SPECIFICATIONS
Display technology
3LCD, 15mm, 1280 × 800 pixel (WXGA) resolution
Lamp
245W UHE
Lamp life
4000/6000 hours (Normal/Eco mode)
Brightness
3300 ANSI lumens
Contrast ratio
Not stated
Inputs
2 × HDMI (1 with MHL), 1 × composite video
1 × RGBHV (D-sub15), 3 × stereo audio
1 × USB-A, 1 × USB-B, Ethernet, WiFi
Outputs
1 × RGBHV (D-sub15), 1 × stereo audio
Control
1 × RS-232C, Remote in, Sync In/Out (for synching other projectors)
Dimensions (w × h × d)
367mm × 155mm × 375mm
Weight
5.6kg


RESPONSES