Every Pixel is Sacred, Part 1
Blended Projection Tutorial: Part 1
Text:\ Paul Newton
Projection blending is not a new concept. For those of you unfamiliar with the term, blended projection involves ‘stitching’ a series of projected images to form a seamless widescreen panoramic image. I was introduced to 35mm slide panoramic projection rigs when I was an AV technician in the early ’90s. The quality of the image was amazing compared to the CRT projectors we were also using at the time. Neither were very bright by today’s standards, but back then projected images were only displayed in complete darkness, and all projectors look bright in a pitch black room! The mechanical nature of the rigs intrigued me; the fact that these things even worked amazed me more.
Video projections today are frequently designed ‘out of aspect’ to create a more interesting canvas than traditional 4:3 or 16:9 aspect ratio screens or projections could ever provide. This technology even allows the event/stage designer to create a ‘digital stage set’ that can be transformed into anything they like, whenever they like. Whilst it can be expensive to create the images and hire the equipment required for a large scale projection blend, so also is set construction and storage! Large-scale blended projection has become a popular way to immerse people in new and different environments throughout an event or show.
OVERLAPPING
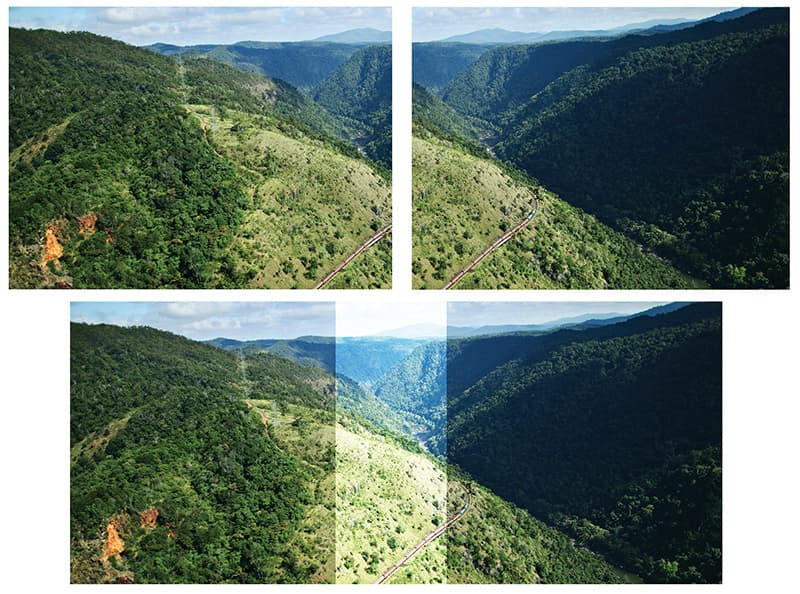
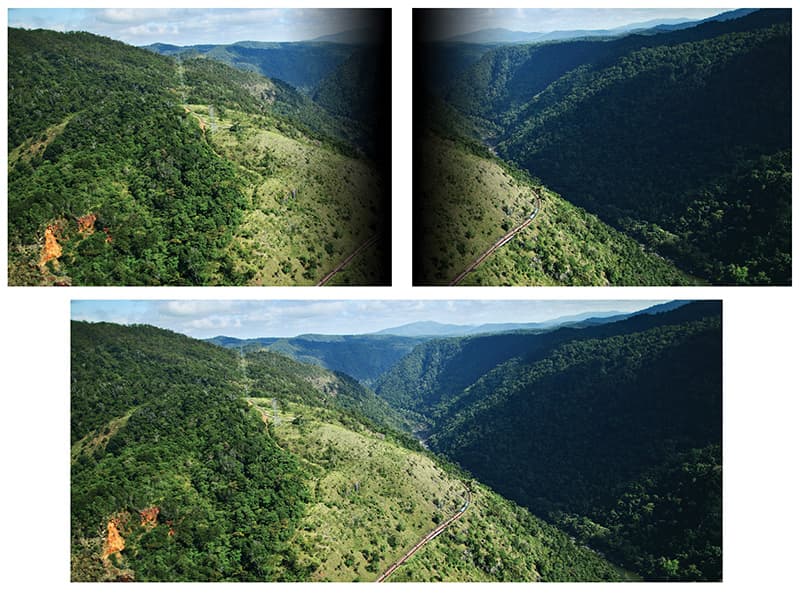
To create a seamless blend between two projected images, the projectors must be overlapped (usually by 15%–25%). However, when you overlap two projected images, the area of overlap will be brighter, because this section is being covered by both projectors. Soft edge blending solves this by fading the overlapping sections to black to produce uniform brightness. In these digital times the fade can be performed within multimedia software, the mixing console or within the projector itself.
The overlap or soft edge area is the most critical part of a blended projection. The slightest difference in colour or pixel misalignment makes the overlap obvious and destroys the seamless effect. The outer edge of each projection must align precisely, otherwise graphics or text passing through this part of the blend will appear ‘blurred’.
PIXEL CALCULATION
The first step is calculating a pixel specification. Although many hardware providers supply blend calculation applications to assist with determining accurate pixel specs, I used these various tools to create my own spreadsheet in Excel. The sheet was pretty simple – it calculated the number of projectors required to fill the screen, the projection overlap (in pixels and millimetres) and the overall pixel width of the display. I further enhanced my spreadsheet to calculate the required projector zoom lens, the projection distance, pixel size and other installation information such as power requirement and weights. Calculating this information accurately is critical, as miscalculations are difficult to fix later in the production process. Annoyingly, you can’t argue with maths and physics, but some clients will always try.
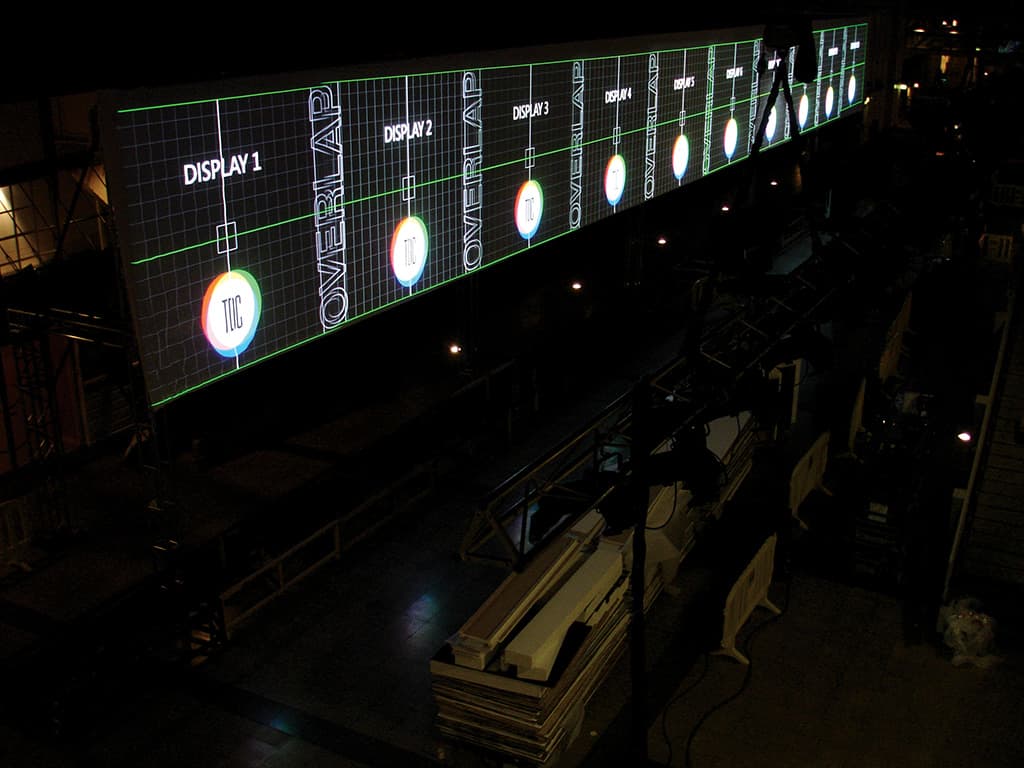
The calculated pixel dimensions are passed on to the graphic design department to build the content at 72dpi (dots per inch). It is valuable to get your designers to build a test grid with hatching and grey-scales at this point. These test pattern files, which can be produced in Photoshop or similar bitmap editing software, need to be pixel accurate and should outline each display edge and the overlap area. Designers will use them as guides throughout the content building process, and projectionists will require them when it’s time to set up the projectors.
CONTENT CREATION
Finding a good, reputable graphic design house with experience in producing this type of ultra-high resolution work can be a challenge, as most designers are used to working on either a 16:9 or A4 canvas. Dealing with extremely wide aspect ratios can be very challenging, as the designer needs to have a clear picture of the real-world scale of the blend. As the audience is not simply looking at a computer screen or a sheet of paper, their location and their distance from the screen will dictate image and font size within the project. Information often needs to be repeated across the screen because the overall width of the projection is often too large for the viewer to see the entire image.
Creating still backgrounds is relatively easy with a program such as Photoshop. However, full-screen multimedia files such as Windows Media Player (WMV) or Apple Quicktime (MOV) can be a little more challenging as files need to be frame-accurate to ensure there is no skipping during playback. Codec selection is also important to make sure that all files are triggered and looped seamlessly. Factors such as frame rate, bit rate and sub-sampling also need to be considered when building large-scale motion files, not only for their impact on replay quality, but for the size of the files produced. Large motion graphics images (exceeding 2000 horizontal pixels) usually need to be split into sections and triggered to play in sync. Smaller files play more comfortably on most systems with no overall reduction in picture quality. There is a delicate balancing act between image quality and safety. Obviously we all want the content to look its best, but it also needs to run reliably on the replay system. Overloading the replay systems can have disastrous results.
Designers need to be aware of the position of the overlap areas when building content, so they can avoid placing finely detailed logos or critical content on these areas. With a perfectly blended projected image this shouldn’t be a concern, but the live event industry is what it is, and time is not always on our side. I have always found it valuable to invite members of the graphic design team out to a live event so they can appreciate the scale and comprehend the ideas and concepts for application in future projects.
“”
Video projections today are frequently designed ‘out of aspect’ to create a more interesting canvas
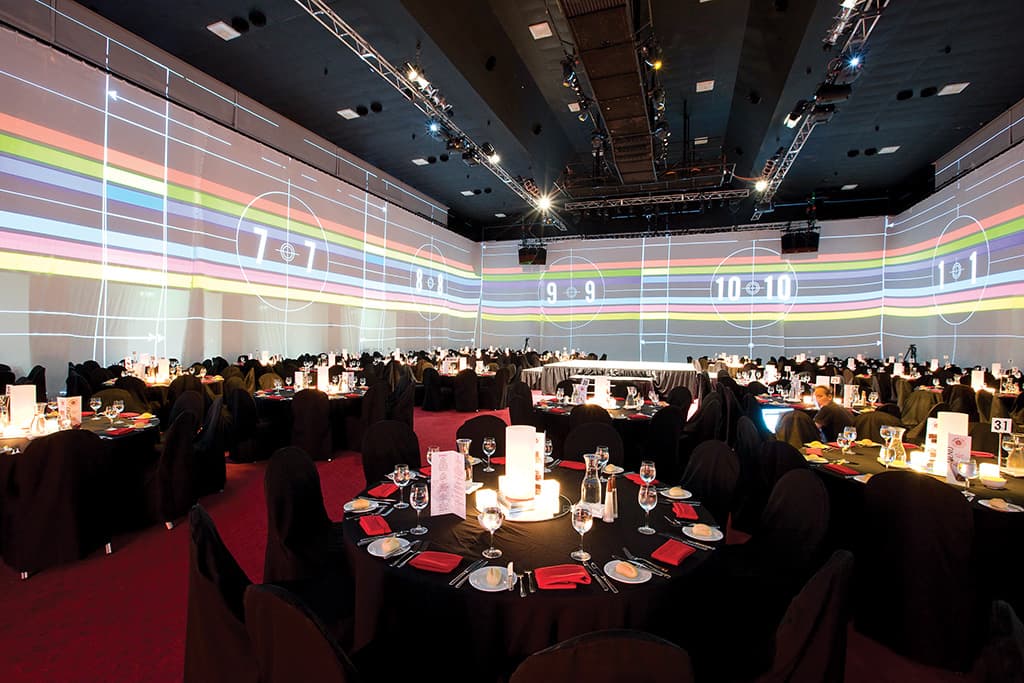
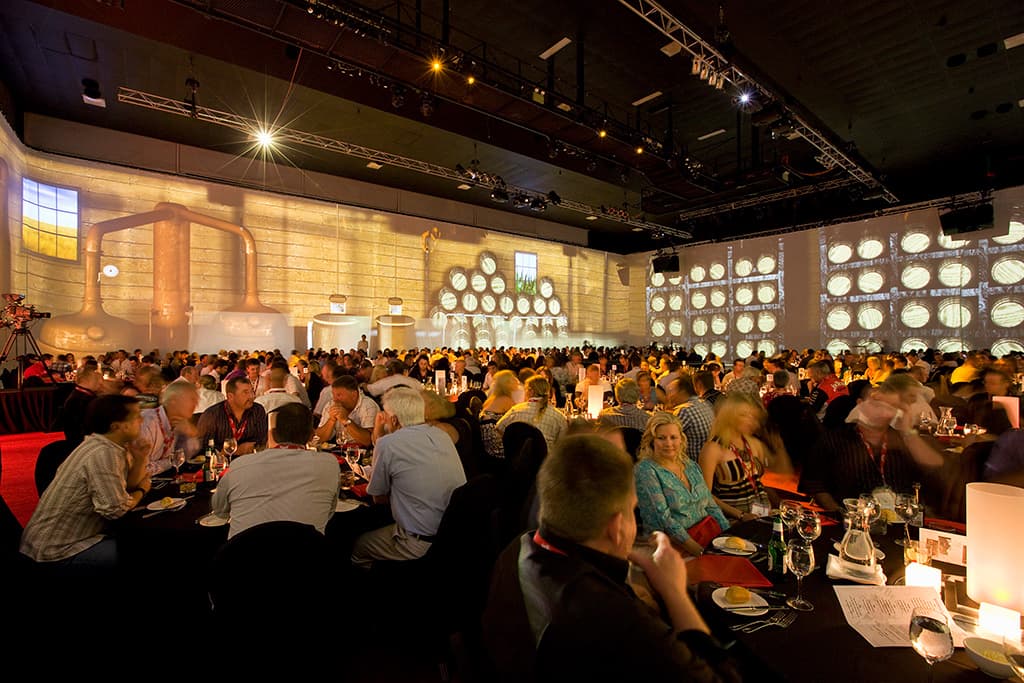
Movie & Still: The alignment images (above) for a 10-projector 360o blend. (below): The environment created for a Jim Beam dealer promotion with the 360o projection system.
MOVING GOAL POSTS
Content timelines need to be clearly defined to ensure all parties are kept in the loop during the pre-production process, as this is where a lot of projects come unstuck. Loading a new version of the conference opener (due to a typo or error) on the morning of the show is, sadly, not uncommon. Clients need to be aware that this process is not as flexible as building a Keynote or PowerPoint presentation. All source graphic files, logos and movies need to be provided a few weeks out from the event, so they can be programmed into the show. Storyboards should be used to clearly outline positioning and movement of all content. Constant changes of content delay the production process and consequently cost money. Clients need to be very clear about their concepts and expectations.
A detailed corporate awards night, complete with 15-20 award categories, each with multiple nominees could have as many as 400 cues and use over 800 different media files. This sort of show would need a couple of days of programming and testing, followed by a pretty comprehensive cue-to-cue rehearsal on site. This process should definitely not be rushed.
In Part II, we will look at the software, hardware and production of blended projection projects.


RESPONSES